
Administration: User Creation
What is User Creation?
- User Creation allows you to create access information for specific users - name, user name, email address, password, etc.
Staff Administration allows you to create, record, and manage the following information about the members of your organization that will be using the system application:
- Name
- system Login name
- system Login password
- Email address
- Active/inactive status
- Role assignment
- Organization assignment
- Taxonomy tag assignment
Use the following procedure for adding staff:
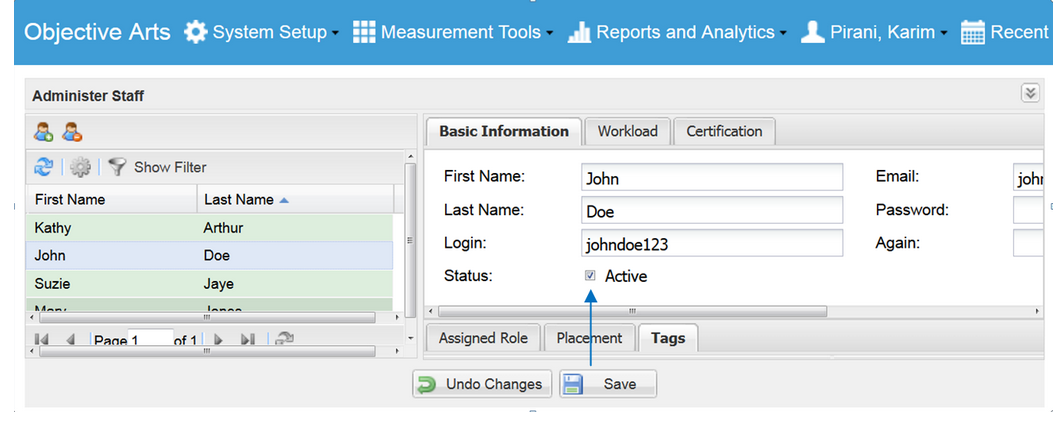
1. From the "System Setup" option on the top menu bar, go down to Administration and click on the "Staff..." option. This will display the screen shown below.
1.1 On the left pane, there is a staff list with the standard selection buttons and filtering capabilities.
1.2 Below the staff list are controls to allow you to navigate to different pages of the list, as well as refresh the list.
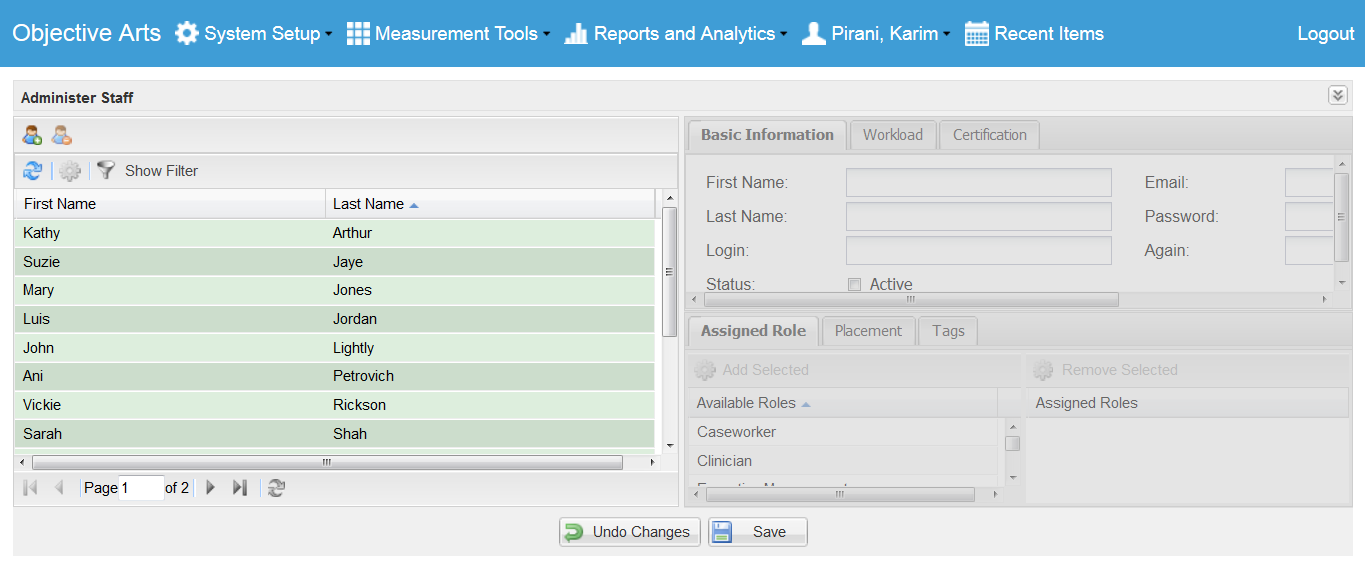
2. To add a new staff, click the Add icon above the staff list area. The system will display a new staff member data entry area.
3. Enter profile information for this staff person (all fields are required):
3.1 First Name
3.2 Last Name
3.3 Email address
3.4 Login name
3.5 Login password
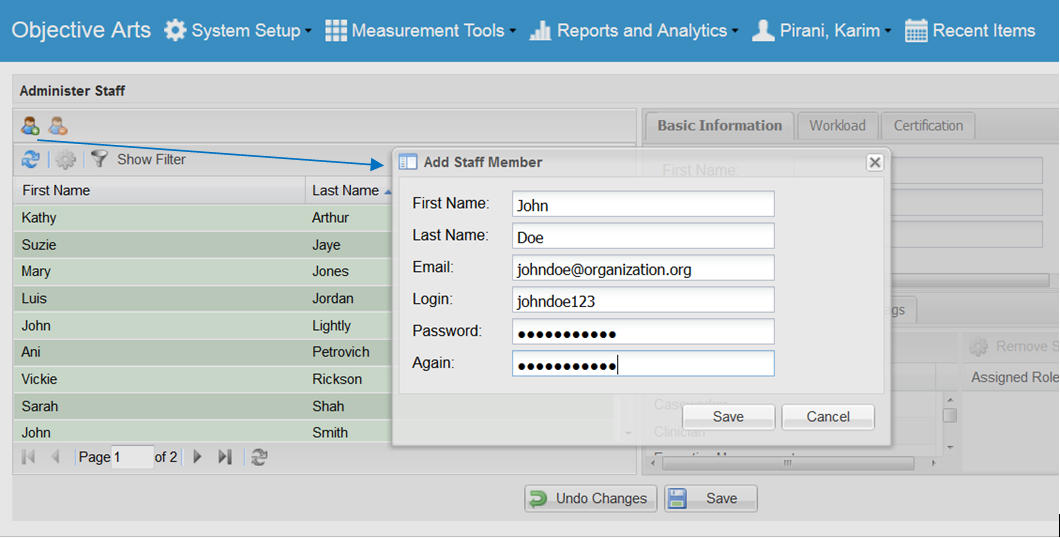
4. Click the Save button to save this information.
5. Double-click on the new staff entry in the staff list
6. Assign this staff person a role
6.1 Click on the appropriate role for this person in the "Available Roles" pane.
6.2 Click on "Add Selected." The role will appear in the "Assigned Roles" pane.
6.3 Similarly, to remove an role, click on the item in the right pane and then click on "Remove Selected"

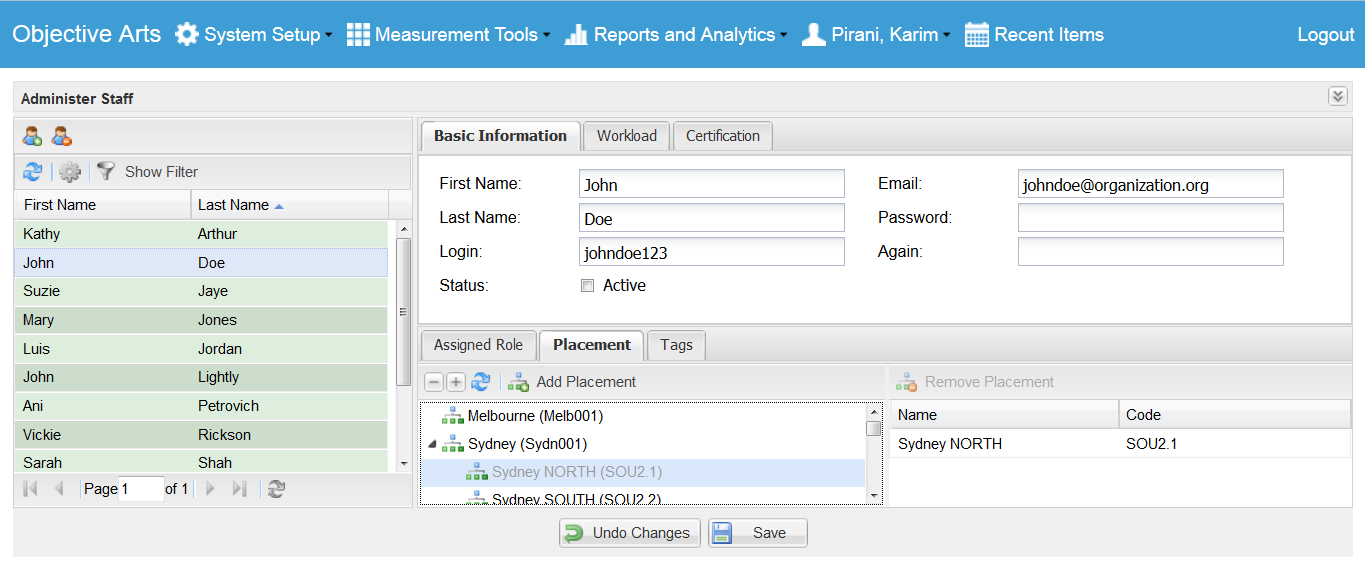
7. Associate this user to your organization using the Placement tab.
This allows you to match the user with the physical or functional area that is providing service to clients.
For more information about administering your organization hierarchy, click here.
7.1 Click on the "+" icon to expand the organization hierarchy
7.2 Click on the organization that this user is associated with
7.3 Click on "Add Placement" to complete the association. The new association will appear in the right pane.
7.4 Similarly, to remove an organization, click on the item in the right pane and then click on "Remove Placement"
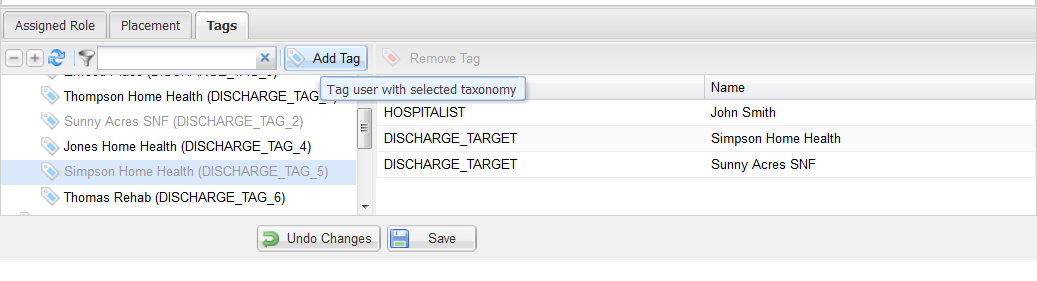
8. Associate this user with one or more tags using the Tags area.
This allows you to connect this user with one or more tag/taxonomy items.
For more information about tagging, click here.
8.1 Click on the Tags tab to display this area.
8.2 Click on the "+" icon to expand the tag hierarchy
8.3 Click on the tag that this user is associated with
8.4 Click on "Add Tag" to complete the association. The new tag will appear in the right pane.
8.5 Similarly, to remove a tag, click on the item in the right pane and then click on "Remove Tag"
9. Finally, click on the "Active" check box in the Basic Information area to allow this user to log in and be visible for system functions.
10. Click on the Save button to save this information.